
Always wanted one…
9th April 2018
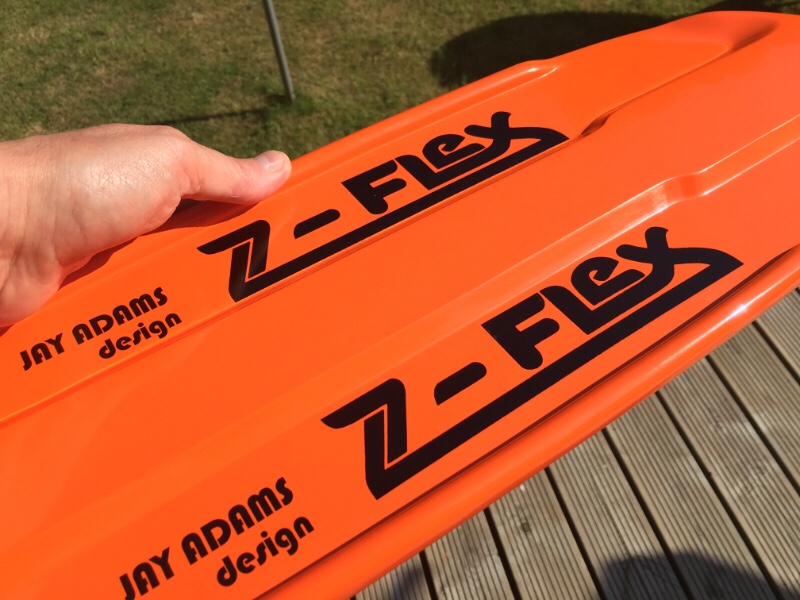
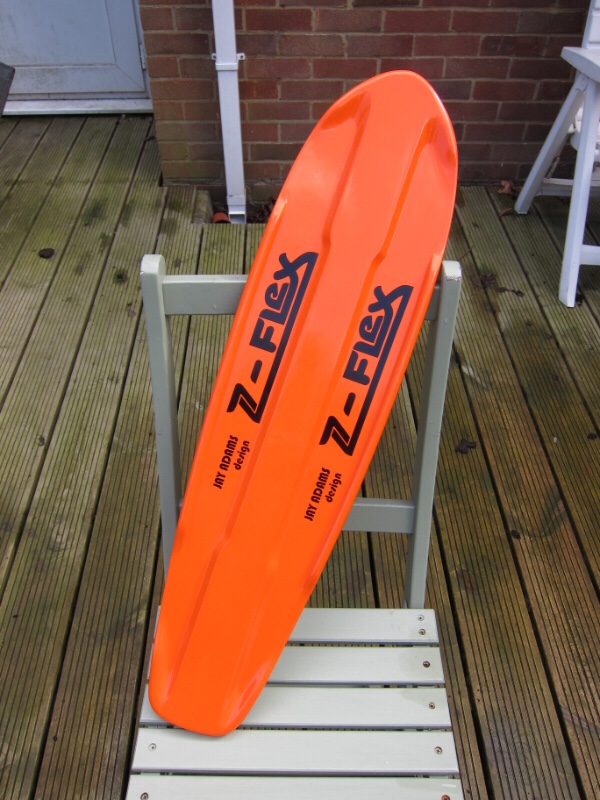
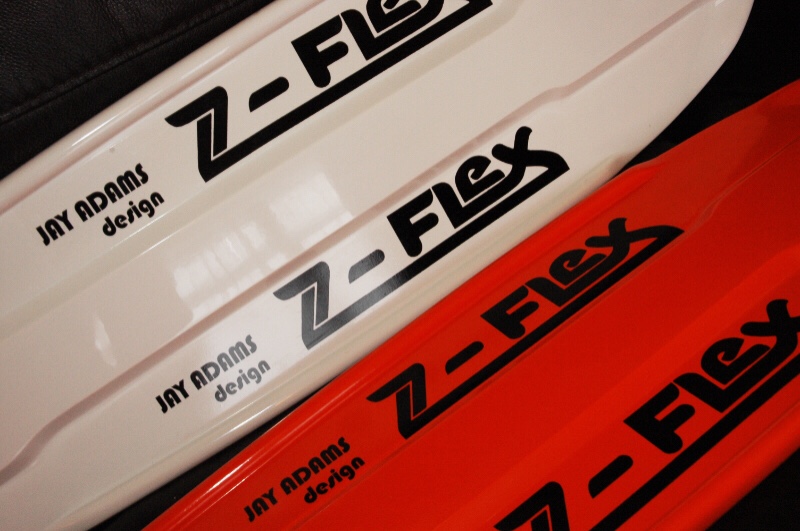
One of my most lusted after things as a grom skateboarder was a Z-Flex Jay Adams deck. Hand made from glassfibre they were expensive back in the day and are silly money now. Never stopped me wanting one though. After guidance and prompting by a talented friend I was persuaded to have a go at a DIY glass fibre version.
This involved making a plug/replica to make a mould from. A bit of old laminate flooring, some scrap wood and car body filler worked perfectly. This was coated with a special epoxy paint finish for mould making.

The mould has to split down the centre of the board lengthwise. So the plug needed to sit half deep on a flat sheet finished with the same epoxy paint.
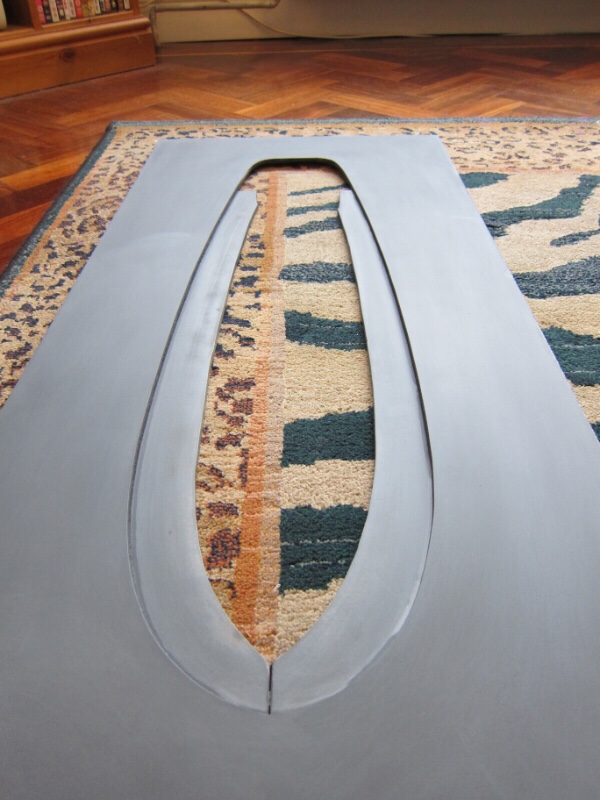

Any gaps between the plug and the backing sheet were filled with plasticine to stop any resin seepage. The backing sheet and plug were then polished with multiple coats of mould release wax.

Then a layer of gelcoat was applied followed by multiple layers of resin and chopped strand glass fibre mat.

Then split the backing sheet from the mould half leaving the plug in place. Polish this side with multiple coats of release wax.

Next coat this with a layer of gelcoat and multiple layers of resin and chopped strand glass fibre mat. This makes the second half of the mould. When cured the mould was split and the plug removed. Polish both sides to the best finish you can. The better the finish on the mould the better finish on the actual item.


Plenty of layers of release wax on both sides of the mould. Then a layer of gelcoat on both halves then both halves were built up using pieces of chopped strand mat and resin. When both sides were built up just under flush, enough mat and resin to fill the final gap was added and add a nice layer of gelcoat around the edge too to hide the join. The first white deck I made I didn’t do this and the joint is visible. Then put the two halves together before the resin starts to go off and weigh it down to ensure a good fit. When cured and if all goes well (mine didn’t the first time) you can split the mould and you should have a complete deck.


Clean off any excess gel coat if you have any. Mine had way too much. A bit of excess squeezed out at the edge is good because it fills the joint line. When the edges are tidied up they can be polished with T-Cut or similar and the joint will be invisible.

Water slide decal sheet is available from various suppliers so you can design the logo and print it yourself at home on your printer. They work just like “Airfix” decals.

As you can see I ended up making two Z-Flex Jay Adams replicas, one white and one orange. The finished article makes a nice wall hanger/objet d’art and fulfilled a long held dream.
Just like Dogtown and the Z-Boyz.
Hi,
Ive just seen your post regarding making a Z Flex Jay Adams model, wow!!! Most impressive, compliments on a superb job. Yes, these babies are hard to come by and if they are available the asking price are very high hitting the 4 figure some if they are NOS.
I wanted to ask you if you would consider making a bespoke model, if so what would be your asking price.
Thanks.
Thanks for looking but I no longer have the mould I’m afraid. I made two decks for myself as wall hangers, a white one and an orange one and then decided I was not going to make anymore so gave the mould to a friend. He makes carbon fibre parts for racing motorcycles, but he is in the process of relocating to Portugal at the moment. He may make some in the future but I don’t know if or when.
Thanks for the link Spike excellent….interesting way to make it…to get two good finished surfaces….is that the way they made it or did they make it building up layers into a basic one sided mould…..Thats how I had thought of making one….but your way looks good way to get two nice surfaces…
Nigel
That is very similar to the way they made them Nigel but their moulds were a lot more heavy duty and braced. My mould was only ever intended to a couple of decks from.
I am also trying to make this same board and I was wondering if I could pay you to make another mold, I’m not experienced in working with fiberglass at all but I want to learn. And if I have a good solid mold it will be easier for me to make the boards, I also plan on making these boards available to other people who want one because nobody else makes reproductions for sale. I’m pretty young and am really getting into this hobby. Also if you gave it to your friend you or I could reach out to him to see if he wants to sell it.
Thanks,
Ian
Ian, no chance of me making another mould I’m afraid, I’ve been there and done it once and don’t fancy the mess and smell again 😉. I have forwarded you contact details of the friend I gave the mould to and you never know he might be persuaded to make one for you…
Hey Spike,
If you’re still around and can share the info of the carbon fiber artist to see if he can make one for a huge 70s era fan and life long surf rat.
Appreciate any info
Jordan
Hi, a bit late perhaps but his contact is here… https://www.oronero100.co.uk/